Tassels, tassels, tassels!
 Yes, I know, that looks like I really like tassels.
But well, no, that’s not true.
I don’t like them – I love them! 😉
Finally, after finishing the last hand sewing stitches for the fast and easy pouch, we reached the endspurt phase of this tutorial! Today we can at long last start with what I consider the fun part – with the embellishments!
Thinking of my projects of the last years, it really seems like I am suffering from a natural weakness when it comes to fancy adornments.
I just can’t resist to produce more and more of this embroidered buttons, tassels, fringes and all this other cute and fancy adornments. But it doesn’t stop with making them, I also tend to add this adornments wherever it is possible… *lol*

Though this weakness might be difficult to endure for my family, I have to say that I can live very well with it. Just my sweetheart is suffering a little bit from it. He definitely forbid me to lay my hands on his tent.
Well, I really think that I can easily resist to paint his tent. But I am looking forward to decorate it with as many wall hangings, pillows, bead spreads,… as I am able to produce… *lol* Yes, this is a promise and a threat at the same time. 😉
Ok, enough funny personal anecdotes for today, let’s continue with the fun part of the fast and easy pouch tutorial:
Todays motto is:
“Tassels, Tassels, Tassels!”
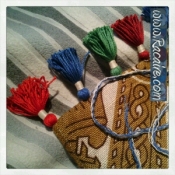
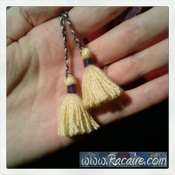
As preparation for the following tassel tutorial here some sneak peek photos of the finished fast and easy pouch and its tassels:
As some of you might remember, I already posted this pictures in my posting: “Sneak peek – more progress pictures of my 14th century inspired gaming pouch“. This tassels are really very easy to make. You will see that they are very similar in the making like the tassels for the needle roll in the needle roll tutorial -> “…fast and easy tassels…“.
…and now we are finally getting to the tassel tutorial. Again I put together some detailed step-by-step photo instructions for you – enjoy! 😀
Tassels for the fast and easy pouch tutorial
[emember_protected not_for=4 do_not_show_restricted_msg=1]…I am sorry, but this content is restricted to users with Premium membership.
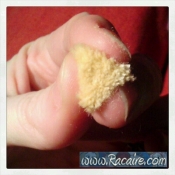
The very first thing we will need for our first tassel are many threads. This threads should all have the same length. To get this threads you can either make a small “helper”* or what I normally do – use your fingers. (* = If you want to make a small “helper”, just take a nice piece of solid cardboard and cut out a rectangle piece in the desired height)
Whatever you decide to use – cardboard or your fingers – you should always add a little bit extra for the handling. That means that if your tassel shall have a final length of about 4cm (or 2inch) you need to work with a “height” of at least 5cm (or 2.5 inch). Please always remember that it is always easier to cut off more but it can be rather difficult or even impossible to add more! 🙂

As you can see on the picture above, I used my thumb to pinch down the end of the thread and then wrapped the thread around four of my fingers -> (1). As soon as I had enough wrappings on my fingers I took my embroidery scissors and cut through the wrapped thread at a 90° angle -> (2). This way I got a nice bunch of threads with a very similar length -> (3).
 The finally needed amount of threads always depends on the thickness of the used thread. In addition it also depends on the desired width as well as the desired fullness of your tassels. For example: this thread is rather thick and therefore I just needed about 20 threads for this tassel.
If you are making more then one tassel for a certain project, it really helps to count the wrappings. This way you will always use the same amount of wrappings and furthermore also of tassel threads for every single tassel. This is a very easy way to make your finished tassels look very similar concerning width, length and fullness. 🙂
For the next step we need one extra thread and a needle to attach the tassel threads to the pouch. Now we actually start with making the tassel. 🙂

First I went with the needle through fabric at the corner of the pouch -> (1). Then I stitched a second time through the same place. This two stitches created a small thread “loop” -> (2). I placed the tassel threads into this newly formed “loop” -> (2). This is a good time for a last adjustment of the tassel threads – the loop should be located in the middle of the tassel threads. As soon as you have a similar length of the tassel threads on both sides the “loop” can be pulled tight -> (3).
Finally I made a firm knot at the underside -> (4). Then I took the tassel threads and laid them over the knot. I gently pulled the tassel threads over the knot -> (5). This is a moment when still some small adjustments could be made to the “head” of the tassel. If you have some “wild” threads you can arrange them now to look more smooth and pleasing.
With the last steps we attached the tassel threads to the pouch. As you can see, it still doesn’t look like a tassel because there are still some more steps to do. To finish the tassel we now need to start working at the “body” of the tassel. For this next step we need a new thread and a needle. I highly recommend to use a thread in a different color. In my opinion a tassel with a “body” in a different color looks much more appealing and fancy.
As you can see at the picture underneath, I laid my thread around the tassel, staying underneath the tassels “head”. The thread on the left side is on top and the one coming from the right side is at the bottom. Lay the upper thread over the bottom thread and add this former upper thread to the other tassel threads which you are holding firmly with your fingers. Then lay the bottom thread over the top thread -> (1).
Hold the tassel threads and the one thread you just added to them firmly. Take the former bottom thread which comes from the right and pull it as tight as possible. Now start wrapping the tassel firmly into the same direction from which this bottom thread comes -> (2).

Actually it’s not really important from which side the upper or bottom thread comes or if you are a “lefty” or “righty”. The only thing you should take care of is that the (shorter) upper thread which you lay over the bottom thread is added to the threads of the tassel at the bottom. This threads need to be held firmly – especially while you are doing the first wrapping.
Furthermore the bottom thread has to be laid over this thread and needs to be wrapped directly back into the same direction from which it comes. If it comes from the left, you wrap the body from right to left after this point. If it comes from the right, you wrap the body from left to right after this point. When worked with enough tension, the thread will hold itself in place this way.
Actually the thread is just “hooked” into itself. This “thread hook”, as I tend to call it for myself, allows me to hide this part of the thread and even better, it gives us the possibility to apply extra tension at the beginning of the “body” of the tassel. This extra tension makes it possible to make a rather perfect and evenly shaped tassel “body”. Please don’t be discouraged when the “body” doesn’t look perfectly after your first try. It takes some practice and several tassels to manage the tension and to create rather evenly shaped bodies.
As soon as you added enough wraps for the body, thread this wrapping thread into a needle. Now take the needle and stitch aslant through the “body” and the “head” of the tassel -> (3). Pull the needle and the thread carefully through the “body” and the “head” of the tassel -> (4) at the picture above or (1) at the picture underneath.
Now stitch back through the “head” and the “body” again -> (2) at the picture underneath. This stitch should be placed rather near the place where you stitched through, just a little bit shifted to the side. Because this is an “invisible” stitch, please try not to stitch over the top threads of your tassels “head” unless you want to create some kind of pattern on top of your “head”. …and now you can carefully pull the thread through the “head” and “body” again -> (3).

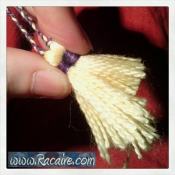
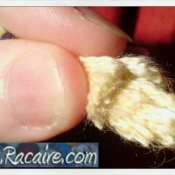
For the next step I “opened up” the tassel threads at the bottom and made 2 knots to connect and “secure” the white threads -> (4). …and as you can see on the picture above I used the needle one more time and brought the white threads from the bottom through the “body” back to the “head” part* -> (5). Now you just need to carefully cut off the white thread and have a nearly finished tassel -> (6).
(* = Yes, you could also just cut off the surplus threads now but the knots might get loose again after some time. With pulling them back through the body you can secure this end threads and the knot inside the body. In addition this way you can hide the different colored threads and the knot very well and keep them away from the visible parts.)

You might ask now – why is the tassel just “nearly finished”?
Because the bottom still looks like “pell-mell” but this can be adjusted rather easily.
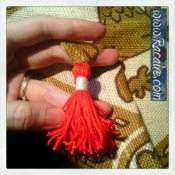
Take the tassel threads firmly between your fingers and stretch them – beginning from the “body”. Stop shortly before you reach the desired tassel length. Here you can cut the threads at an 90° angle with your scissors…
After the last step your tassel will need some help to look good and full again. For this step the tassel normally just needs to be shaken up a little. …and voila… we have a tassel! 😀

Btw. if you have more then one tassel and would like all your tassels to have the same length, you can do the following step which I already posted in my tassel tutorial for the needle roll project. This step can be applied regardless if the tassel is attached to a cord or a pouch.
I hope you enjoyed todays tassel tutorial – now there is just one more step left and the pouch is finished… 😀

You can find all postings about this project in the category:
Craft with Racaire – #2 fast & easy pouch
Short overview of the postings till now:
Step 1) Fast and easy pouch tutorial & how to work with “rapports”
This posting explains how to calculate the needed fabric for the easy pouch tutorial. I also added some extra information: “how to work with rapports” (repeating patterns).
Step 1.1) Hand sewing stitches: Running Stitch…
This posting is an in-depth description of the first and most basic hand-sewing stitch you will need for this tutorial – the Running Stitch.
Step 1.2) Hand sewing stitches: Back Stitch (and Stem Stitch)…
Another in-depth description of a basic and helpful hand-sewing stitch you will need for this technique – the Running Stitch.
Step 2) Hand sewing the sides
Here you can find a detailed step-by-step photo tutorial about how I hand sew the sides of the “fast and easy pouch”. It includes all important basic steps for this process including the pinning, how to start with the sewing, how to secure your thread from slipping,…
Step 2.1) Hand sewing the corners
Another detailed step-by-step photo tutorial that shows you how to hand sew the nice pointy pouch corners of your fast and easy pouch.
Step 2.2) How to start a new thread & hide it…
Here you can see how I start a new thread while I am working at a seam finishing and how I hide the beginning of the new thread as well as the end of the old thread inside the seam.
Step 3.1) Hand sewing the top – pinning
This posting is about how I pinned the top of the pouch for the final hand sewing.
Step 3.2) Hand sewing – how to start a new thread & hide it .2 🙂
Sounds similar to “Step 2.2” above but is very different – in this step-by-step tutorial you can see how I start and hide a new thread in an already finished seam.
Step 3.3) Chain Stitch and how to use it for hand sewing
Another in-depth description of a basic embroidery technique – the Chain Stitch.
Step 3.4) Chain Stitch and how to use it for decorative hand sewing
This step-by-step photo tutorial shows the practical application of the Chain Stitch for decorative hand sewing as described in Step 3.3 above.*
Step 3.5) Chain Stitch & how to start a new thread
This detailed photo tutorial explains how to start a new thread while you are using Chain Stitch for decorative hand sewing (or embroidery).
Step 3.6) Last seam finishing for the pouch 🙂
This tutorial explains all steps which are needed to finish the last seam finishing and the top part of the pouch.
* You can find an example of Chain Stitch used for a medieval inspired embroidery project here: 14th century hood with daggings, long liripipe & decorative chain stitch embroidery







You must be logged in to post a comment.